Audio Marker Assistant
Audio markers are used to synchronize slides with audio, usually the beat of music. Audio markers can be added directly in the Timeline. However, using the Audio Marker Assistant is much more powerful and convenient, so it is the recommended method to create markers. Select from the menu to open the assistant. The assistant offers two different panes, each one optimized for different situations: Periodic Markers and Custom Markers.
If you want to see more of the audio waveform, click on the right edge of the sheet, and drag it right to make the sheet wider. Use the timescale slider to compress or expand the waveform. This helps to see more at the same time or to zoom in on certain section of the audio. Checking the “Enhance waveform” checkbox enlarges the audio waveform vertically, to make quiet section of audio more easily visible, but this does not change the audio in any way. This is just a visual help inside this assistant!
Click on the Play button or press spacebar to start and stop audio playback. Pressing the ← or → keys jumps back or forward 2s, which helps to listen to a certain section of the audio multiple times. Using the scroll gesture on your trackpad or magic mouse, you can move around in the waveform. Clicking anywhere in the waveform places the playhead (a vertical black line) at this location. While playing the audio, the display flashes red when an active audio marker is passed.
Periodic Markers
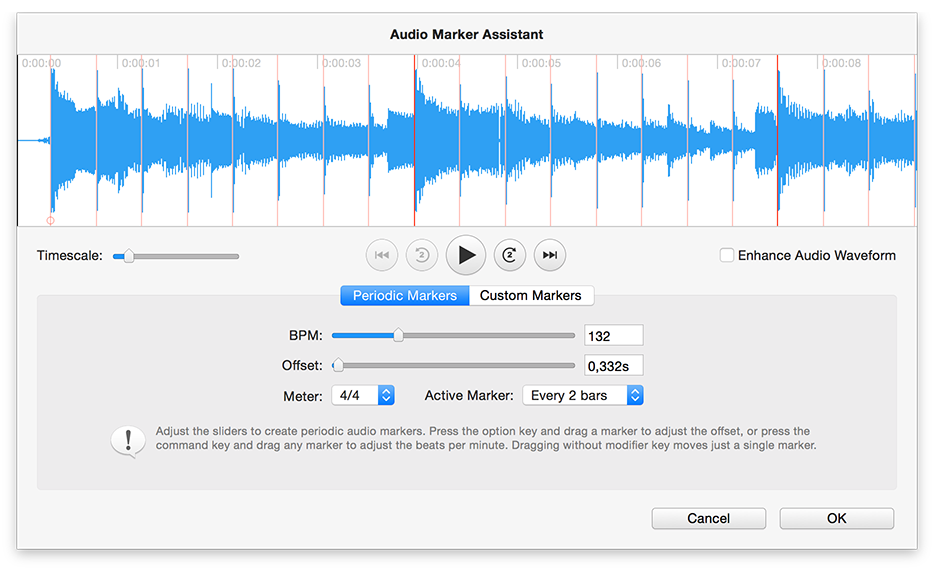
This mode is suitable for songs with a regular beat, like pop, rock or dance music. Working in this mode, you choose the beats per minute (BPM) and an offset (time for the first marker). All markers are calculated from these two values. If you are lucky, your MP3 or AAC music files already has the BPM value stored in a metadata tag. If not, then you have to find out yourself. There are three different ways to adjust the BPM and offset values:
- Drag the sliders
- Enter the values numerically in the text fields
- Drag the audio markers (red lines) in the waveform while pressing the ⌘ or ⌥ keys. This is the most convenient method.
Dragging an audio marker with the ⌥ key adjusts the offset value - all markers are dragged together. Dragging an audio marker with the ⌘ key adjusts the BPM value - this spreads the markers apart or moves them closer together. The goal in both cases is to match the markers with the beat of the music. For some songs this is really easy to do, for others more difficult.
Markers can be active or inactive. Only active markers are used for synchronization. Once you found the perfect BPM and offset values, so that the markers match the beat, you need to decide which slide duration you want. You can change the slide duration by only activating every nth marker. The two popups “Meter” and “Active Marker” are used to achieve this.
First select the meter of the music. Most pop music uses the 4/4 meter, but other genres can have different meters. If you don't know the correct meter, listen to the music a few times, count the beats and try to feel the difference between strong and weak beats. Now count the first set of a strong beat and the following weak beats till the next strong beat. The result is the meter. For example, if you have one strong beat followed by two weak beats your meter is 3 or 3/4. That way you should be able to find out. Next decide whether you want an active marker for every bar, every second bar, or every fourth bar. This choice largely depends on the tempo of the music, and how long you want your slides to be visible - it is your artistic choice.
Once you are satisfied, click on the
Custom Markers
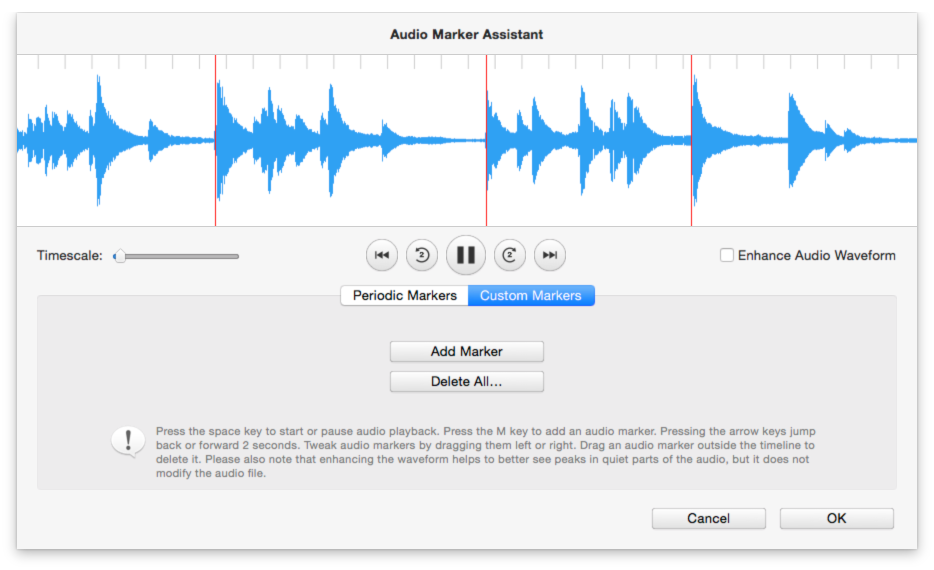
Music that doesn't have a regular beat, or that changes tempo several times may be difficult to work with in the Periodic Markers pane. Classical music or motion picture soundtracks are a good example. In this case it may be easier to switch to the Custom Markers pane and create the markers “by ear”.
Creating markers in this pane is pretty simple. Start playback by pressing the spacebar key. Whenever you want to add a marker press the M key or click on the
To review the markers, rewind and play again. If a marker is slightly off, then stop playback by pressing spacebar again, then click and drag the marker to the correct position. Jump back a few seconds, and resume playback again to check if the marker is okay now.
If you find that you messed up and need to start over, then simply click on the

