Animation Assistant
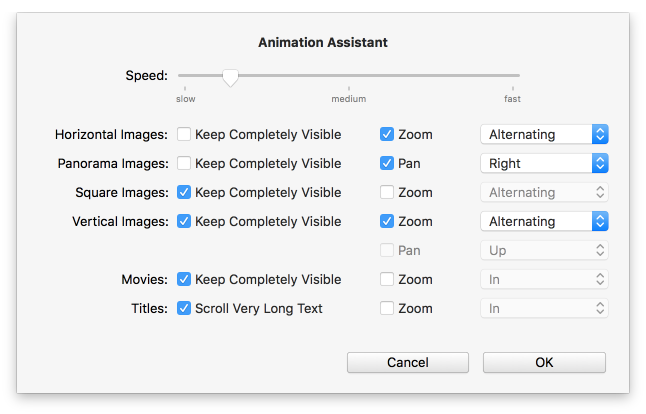
Select one or more visual items in the Storyboard or Timeline. Then choose from the to open the assistant. The assistant lets you apply animations to the selected visual items by choosing from several options. You can choose animation options for different types of images, movies, and titles separately, because for each type slightly different settings are most useful. Usually you choose your settings in this assistant once (according to your personal likes), and then you leave those settings untouched.
Click on
Speed
First you need to choose the animation speed with the slider.
Horizontal Images
For regular images zooming (in, out, alternating) makes most sense.
Panorama Images
Widescreen panorama images are best panned (left or right). You also have the option to show the whole panorama - panning animation is not available in this case and the image will be shown letterboxed on the Stage.
Square Images
Square images can be zoomed (in, out, alternating). Since the image composition in square images is usually important, it make sense to check “Keep Completely Visible”.
Vertical Images
For vertical images you have several options. They can be zoomed (in, out, alternating) or panned (up or down), but not both at the same time. Uncheck “Keep Completely Visible” if you want to avoid the pillar-boxing effect (i.e. showing background color to left and right of the image).
Movies
Movies can be zoomed (in, out, or alternating), but since already contain motion, this is not needed in most cases. If the aspect ratio of the movie does not match the aspect ratio of the Stage, you may want to check “Keep Completely Visible”.
Titles
Titles can be zoomed (in, out, or alternating). Long titles can also be scrolled. If a title is higher than the Stage then it will scroll up, like the traditional scrolling credits animation. If a title is a single line and it is wider than the Stage, then it will be scrolled from right to left, creating a “stock ticker” effect.
