Adjusting Timing in the Timeline
This section describes how to adjust slide durations, audio fade-ins/fade-outs, audio volume and sync images to audio. First switch to Timeline view by clicking on the Timeline button.
Then select an appropriate timescale by using the slider at the bottom left of the window. By dragging the slider to the right, you zoom in horizontally, and any adjustments you make to the timing will be more precise.
Adjusting Duration Manually
The Timeline view displays slides as a rectangular bar the width being proportional to the slide duration. The longer the duration, the wider the rectangular bar. Where a slide overlaps with the next slide, a “stair step” shape is displayed. This stair step is called a Transition Interval. The middle of the Transition Interval displays as an icon that indicates the type of transition. When you drag the lower half of the vertical edge (A), you adjust the slide duration. When you drag the upper half of the vertical edge (B), you adjust the transition duration.
To adjust the duration of the slide, click the lower half edge (A), and drag to the left or right. The cursor changes to a directional arrow as you drag and the width of the slide changes. To adjust the duration of the transition, click the upper half edge (B) and drag to the left or right. The cursor changes to a directional arrow as you drag, and the width of the transition interval changes.
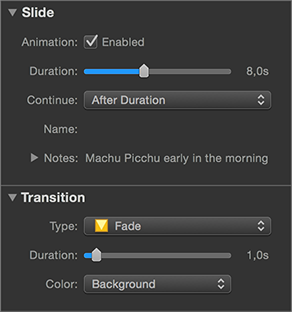
Any changes you make by dragging in the Timeline view are also displayed in the Slide Options in the sidebar.
Syncing to Audio Manually
Timeline view displays the waveform for each audio item. This visual representation of the audio waveform allows you to locate certain points of a song (or effect or narration) by identifying big amplitudes (louder sounds) or low amplitudes (softer sounds). You can then adjust slide durations so that transitions occur at the appropriate time. For example, you might want to start a slide at a certain point when the audio increases in volume. The waveform helps you to visually pinpoint the exact location.
Synchronizing your slides with audio in this manual way has a big drawback. If you change any slides before the current location, everything might shift horizontally and synchronization would almost certainly be lost. For this reason FotoMagico also offers a better, more robust mechanism for synchronizing slides to audio: Audio Markers.
Syncing With Audio Markers
Audio markers are indicators for important times in an audio item. In a song audio markers would be placed on the beat of the music. Markers are displayed as thin red lines on top of the audio waveform. Markers can be active (opaque red line) or inactive (transparent red line). Only active markers are used for synchronisation.
When audio has markers and the slides above the audio are set to “Continue at Audio Marker”, then the transition to the next slide always happens when the currently playing audio passes a marker. This helps to stay in sync, even if something preceding the current slide was changed.
There are several different ways to add markers to an audio item:
- Select a single audio item in the Timeline and preview your slideshow. When you want a transition to occur, press the M key.
- Select an audio item, then click and drag the playhead to scrub through the slideshow. Once you are at the correct time, press the M key.
- Right-click in the waveform and select > from the context menu.
- Select a single audio item and then choose from the menu.
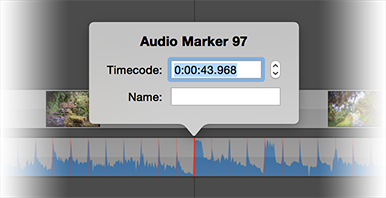
If an audio marker is a little bit off, you can click and drag the red lines in the Timeline to adjust the time of a marker. Another option is to double-click the marker and edit its time numerically.
To remove an audio marker, right-click an audio marker in the Timeline and select from the context menu. Another option is to simply drag a marker outside of the audio item.
Using the Audio Marker Assistant
The Audio Marker Assistant is by far the most powerful and flexible way to add markers. For this reason this is the recommended method to synchronize your slides to the audio. Select an audio item and then choose from the menu.
The assistant has two different workflows: “Periodic Markers” and “Custom Markers”. Which one is more appropriate depends on the kind of music you are using. Pop, Rock, or Dance music with a regular beat is suitable for “Periodic Markers”. Classical music or Soundtracks that often changes tempo may be more suitable for “Custom Markers”.
Once you click OK, the slides above the audio item are automatically set to “Continue at Audio Marker” and their durations are adjusted, so that animation speeds will stay the same.
Periodic Markers
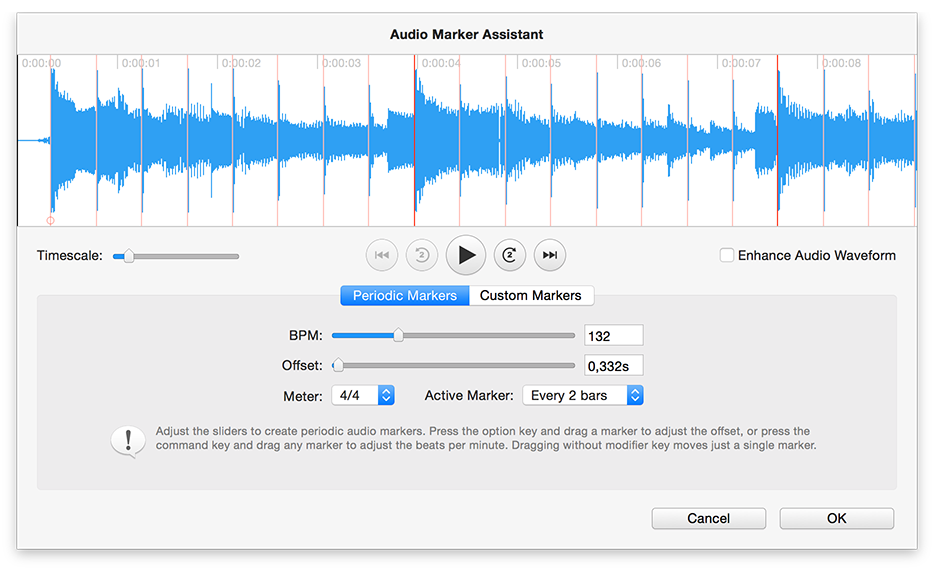
Use Periodic Markers if your music has a regular beat. To create periodic markers you can adjust the BPM (beats per minute) and Offset sliders. Watch how the red lines (markers) in the waveform display change as you drag the sliders.
Another option is to click on the red lines and drag them. Dragging with the ⌥ key drags all markers at once. This is the same as adjusting the offset slider. Dragging with the ⌘ key moves the markers closer together or spreads them apart. This is the same as adjusting the BPM slider. Dragging without a modifier simply moves a single marker. Please note that in this case this marker if off the regular beat.
Markers can be active or inactive. Active markers are drawn in opaque red, while inactive markers are drawn in transparent red. Only active markers are used for synchronizing the slides with music. The two popups called “Meter” and “Active Marker” determine which markers are set to active. First you need to find out the meter of your music. Most musical pieces have 4/4 meter. Then choose whether you want to have an active marker for every bar, every 2nd bar, or every 4th bar. The choice largely depends on the tempo of the music, and how long you want your slides to be visible.
Custom Markers
Use Custom Markers if your music does not have a regular beat or if the tempo of the music changes. To set custom markers, start playing the music by clicking the Play button or by pressing the spacebar key. Press the M key while the music is playing to add a marker.
To adjust a marker first stop playback by pressing the spacebar key again. Then click on the red line and drag it to the left or the right. Test by starting playback again. Press the left/right arrow keys to jump back or forward 2s during playback. This helps if you want to hear a section multiple times, to get the markers just right.
Editing Video by Cutting Slides
While scrubbing in the the timeline, you can cut the slide that is currently visible in the Stage into two separate slides by pressing the C key. The slide will be cut into two separate slides at the playhead time.
This is especially useful for editing long video sequences. Place a long video clip into the timeline. Then click on the playhead and start dragging it to scrub through the video. The Stage will display the video at the current playhead time. Whenever you wish to cut the video, press the C key. You can do this multiple times. When you are done, release the mouse button. You now have multiple slides instead of the initial single slide. You can now select and delete those slides whose video segments you do not want.


