Working with Layers
Layers are a way to add multiple images, movies, or titles to a slide. For example: you can have a slide with one image and multiple titles, a splitscreen slide with multiple images, or a picture-in-picture slide. There are a lot of creative ways to use layers. Each layer can be animated and faded independently. A slide can have a up to six layers, regardless of the layer type (image, movie, or title).
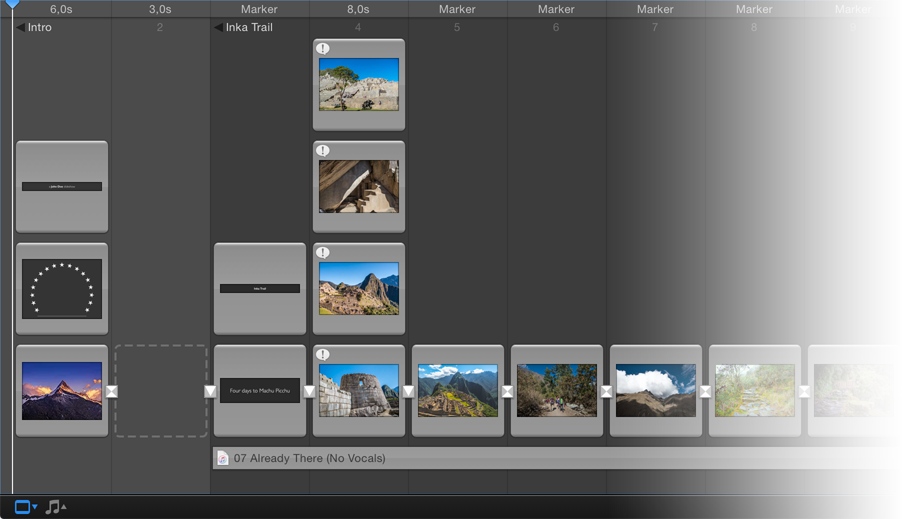
When visual tracks are expanded, you can always see all layers, but the Storyboard/Timeline requires more vertical space, while the Stage will be given less vertical space. You can always toggle this setting, depending on whether you are currently focusing on the Storyboard or the Stage.
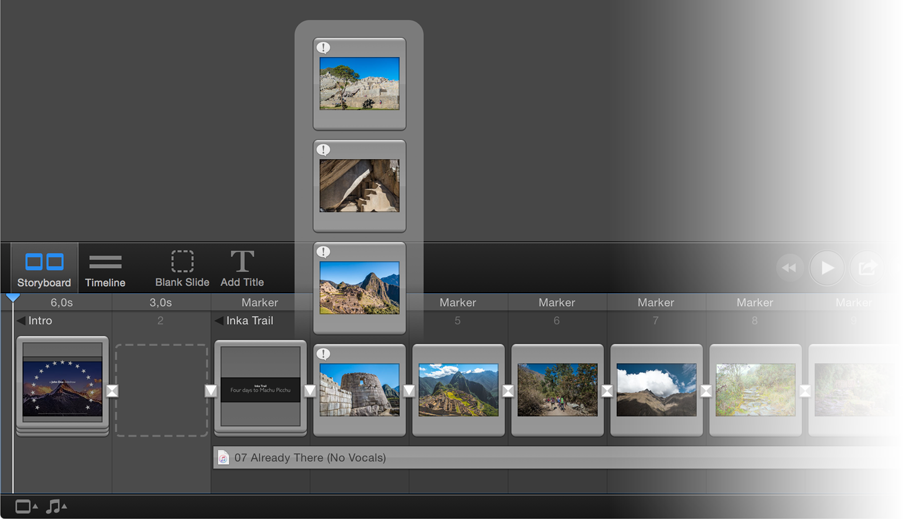
If the visual tracks in the Storyboard/Timeline are collapsed, the layers of each slide are displayed as a stack of frames, keeping everything neat and organized. When you mouse-over the stack, the layers (images, movies and titles) associated with that slide autoexpand so you can see each frame (and its thumbnail).
Adding Layers to an Existing Slide
You can add up to six layers to an existing slide. A layer can contain an image, a movie, or a title. You can do this in the Stage or in the Storyboard/Timeline.
When using the Stage, make sure that only the slide you are adding to is selected in the Storyboard. Its layers are displayed in the Stage. Drag a single image or movie onto the Stage to add the layer.
When dragging a single image or movie to the Storyboard, a yellow highlight indicates where the new layer will be added. You can add the layer above or below existing layers.
To add an image layer:
- Drag a single image from the Image Browser or from the Finder.
- Drop the image in the Stage or in the Storyboard. When dropping in the Storyboard, a yellow highlight indicates where the image will be added. Make sure to drop it above an existing layer. The newly added layer is automatically selected.
- You can then move, zoom, or rotate the new image layer in the Stage to achieve your desired effect.
To add a movie layer:
- Drag a single movie from the Movie Browser or from the Finder.
- Drop the movie in the Stage or in the Storyboard. When dropping in Storyboard, a yellow highlight indicates where the movie will be added. Make sure to drop it above an existing layer. The newly added layer is automatically selected.
- You can then move, zoom, or rotate the new movie layer to achieve your desired effect.
To add a title layer:
- Click the Add Title button in the toolbar.
- A new title layer appears in the Stage, ready to edit.
- With text already selected, enter your title text.
- When done, press the Enter key or click outside the title layer.
- You can then move, zoom, or rotate the new title layer to achieve your desired effect.


