Creating a DVD
Many users wish to present slideshows in the comfort of their living room, using their TV set and a DVD player. While this does no justice to the quality of FotoMagico slideshows, FotoMagico helps you create a DVD of your slideshow. FotoMagico does not burn a DVD directly. Instead it creates a QuickTime movie file and relies on third party software like Roxio Toast Titanium or Apple iDVD to burn the DVD.
Preparing Your Slideshow
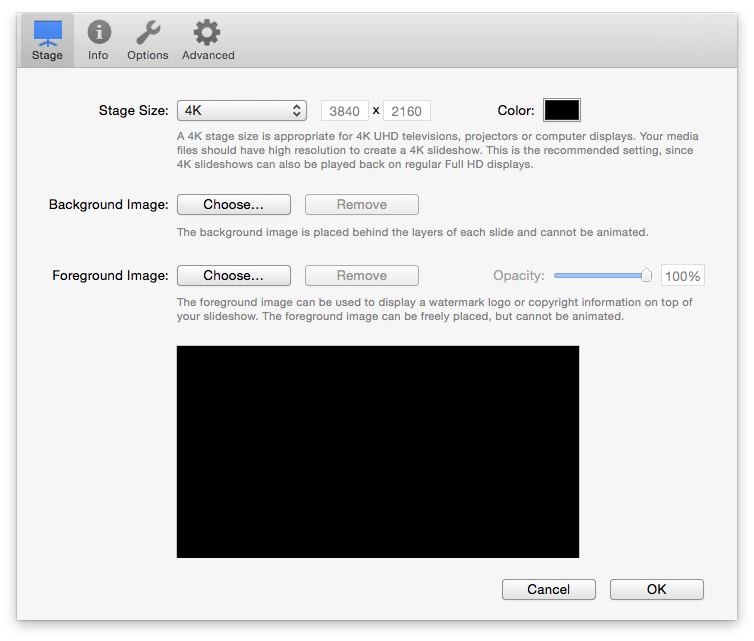
Television sets come in two different shapes: traditional TVs with 4:3 aspect ratio and widescreen TVs with 16:9 aspect ratio. To make sure that your slideshow looks good on a wide range modern TVs, we recommend that you create your slideshow with a 16:9 aspect ratio. The 4K choice when creating a new slideshow document is the best choice for this, because it creates a high resolution 16:9 slideshow.
If you already have an existing slideshow with a different aspect ratio you may want to go to the slideshow settings and change the Stage Size by selecting from the menu.
Slideshows that do not have the correct aspect ratio can be made to match the aspect ratio of your TV screen. There are two different choices: Letterboxing and cropping.
Letterboxing adds black bars at the top and bottom of the image. Cropping cuts away part of the image to make it match your TV. Pillarboxing is a rare case: it adds black bars to the left and right of the image and only happens if you present a 4:3 slideshow on a widescreen television.
Exporting Your Slideshow
Select the option from the menu. An assistant will appear that guides you through steps necessary to create a DVD.
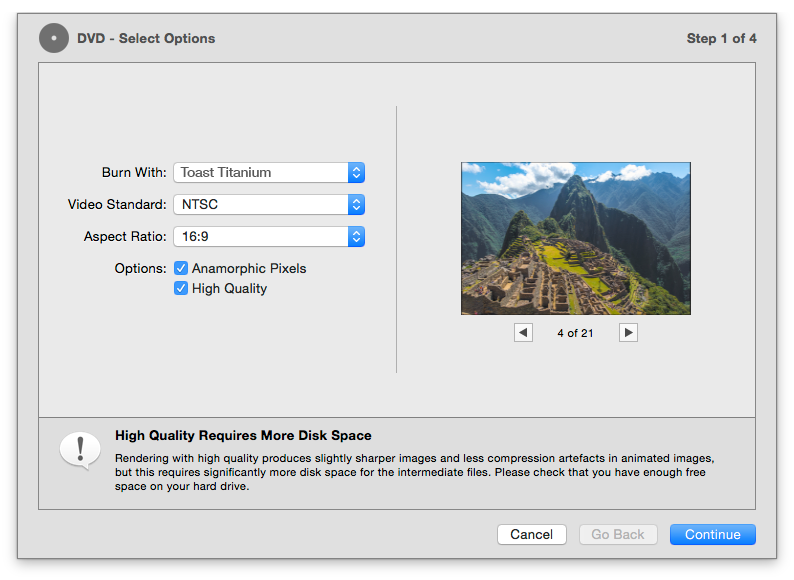
Step 1 of 4: Select Options
Select the application which should be used to burn the DVD (Roxio Toast Titanium or Apple iDVD), the video standard (NTSC or PAL), and the aspect ratio (16:9 or 4:3). The 16:9 choice is only available if the stage size of your slideshow is 16:9 or wider.
The preview on the right side will show you what to expect from each choice. Use the left and right arrow buttons below the preview to step through each slide of the slideshow.
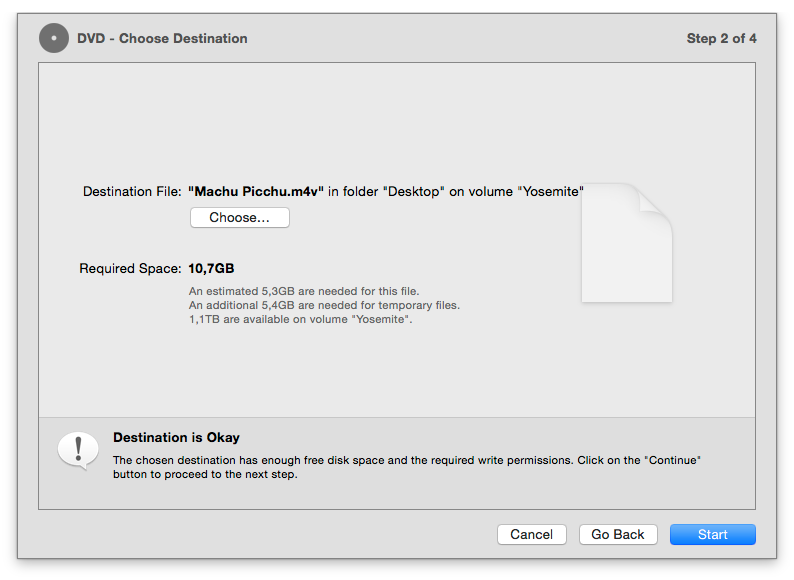
Step 2 of 4: Choose Destination
Specify where the intermediate QuickTime file should be saved. This QuickTime file will be used as input for Toast Titanium or iDVD.
FotoMagico will suggest a reasonable filename and destination folder. If you want, you can change the filename or destination folder. Please make sure to select a folder on a volume that has enough free disk space. Also make sure to only select a folder for which you have write permissions.
Please note that the required disk space is also displayed. This required space is the sum of the estimated size of the final output file and the size of temporary files.
Step 3 of 4: Exporting
Once you click the Start button the exporting will begin. Exporting is usually done in 4 steps: Preparing, rendering video, rendering audio, and compressing video. A progress bar for each step is displayed at the bottom of the assistant. Depending on the duration of your slideshow this can take quite a bit of time, so you may want to do this overnight.
Step 4 of 4: Finish Up
The slideshow has been exported to a QuickTime file and saved in the folder that you specified earlier. Now this file will be opened in the DVD burning application that you selected before (Toast Titanium or iDVD).
From here on, you leave FotoMagico and continue your work with the DVD burning application. For details on working with the DVD burning application refer to the Toast Titanium or iDVD help pages.


